Before we start make sure you have a (1GB or more) pen drive
Making the USB bootable
- Download from the site [- Download Direct from CD Forum: USB_MultiBoot_10.zip- USB_MultiBoot_10.zip http://reboot.pro/4900/]
- Scan the file, and unzip it
- Click on the file [PeToUSB]
- Once the dialog box is opened [press a key to continue]
- Press [p] and it will open another software and then select the USB drive and press start
- Alert box appears press [Yes], then it will again ask "Are you sure you want to continue" press [Yes], then the formatting will start.
- Close the software once done
- Go back to the dos window, which will give you some options like "A..." "B..." and etc..
- Press [1] in which will open a selector box in which you will select your Pen/USB Drive
- Next press [2] to select the Windows XP folder, where you have you installation files. However, make sure you select the root folder eg. You might have sub folders like [DOCS][i386], so you have to select the root of these sub folders.
- Next you will get a dialog box stating a detailed summary of your installation like the Password, Serial and etc..Then press [Yes]to continue
- Next you will get random prompt boxes, then you have to fill in your data of your choice
- Press [2] again and select your USB/Pen drive and press [OK]
- Press [3] to copy files to the drive
- Press [Yes] to finish.
- Press [f2] to set up BIOS
- Go to boot options and set the booting order [Primary boot:Hard disk], SATA[IDE], f12 boot enabled [enabled], save changes and exit
- Next press [f12] to bring out a screen which will have three options, select [f12 boot from USB]
- Next select [1] from moving your arrow pointer and pressing enter in the screen where it states "Begin text mode setup windows xp..."
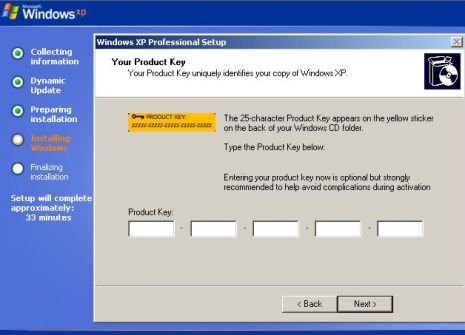
- Next you will be taken to windows setup wizard Now here is the trick!, Make sure you delete all partitions in the hard drive and then proceed to setup windows
- After installation the system will automatically reboot and next press [f12] to proceed to the small dialog box with the three options, proceed by selecting [f12 boot from USB]
- Next select the second option of the three options displayed, then you will be taken to the windows installation wizard
- Once you have installed everything, the computer will restart back again
- Again, press [f12] to get into the 3 options and select [f12 boot from USB] and select the second option which will take you to windows desktop
- Finally, remove the USB and restart the system, you will be prompted a screen stating "Microsoft windows XP professional" and one other option called "USB repair..", select "Microsoft windows XP professional" and here we go Windows XP...
Lastly comes the drivers for your model..which you can Google and find out in their respective websites..