This is really useful for web designers who are thinking of designing websites
http://webdesignledger.com/tools/15-useful-web-apps-for-designers
Tuesday, June 12, 2012
Saturday, April 21, 2012
First jQuery Plugin Random Colors
The jQuery Random Colors plugin is a cool plugin that generates random colors on elements. The plugin contains three modes that you can apply. They are
First, reference the jQuery library javascript file in your html page. Next, reference the jquery random colors javascript file.
Next, apply the function in the element that you wish to apply. In the example below I have used the effect to happen once the element is clicked. The first element applies random colors to the text in the element. The second element applies random colors to the element's back color. The third element applies random colors to both the element's text and background.
HTML Page
- onlyBackground - which will only colorize the back color of the element
- onlyText - which will only colorize the text of the element
- both - which will color both the text and back color of the element.
Where can I find the plugin
The plugin can be downloaded here . Also, make sure you refer the jQuery library itself for this to work.How to use
First, reference the jQuery library javascript file in your html page. Next, reference the jquery random colors javascript file.
<script src="//ajax.googleapis.com/ajax/libs/jquery/1.7.2/jquery.min.js"
type="text/javascript"></script>
<script src="jquery-randomcolor-plugin.js"
type="text/javascript"></script>
Next, apply the function in the element that you wish to apply. In the example below I have used the effect to happen once the element is clicked. The first element applies random colors to the text in the element. The second element applies random colors to the element's back color. The third element applies random colors to both the element's text and background.
randomColor('onlyText');
randomColor('onlyBackground');
randomColor('both');
HTML Page
    <script type="text/javascript">
        $('p').click(function () {
            $(this).randomColor('onlyText');
        });
        $('div#header').click(function () {
            $(this).randomColor('onlyBackground');
        });
        $('div#footer').click(function () {
            $(this).randomColor('both');
        });

    </script>
<html xmlns="http://www.w3.org/1999/xhtml">
<head runat="server">
    <title></title>
    <style type="text/css">
    .sizeBox, #header, #footer{width:100%; height:200px; border:1px solid #000000; cursor:pointer; font-family:Calibri; font-size:40px; text-align:center}
    </style>
</head>
<body style="background-color:#cccccc">
    <form id="form1" runat="server">
    <div id="header">click here to display <em>Only Background</em></div>
    <p class="sizeBox"> click here to display <em>"Only Text"</em>
    </p>
    <div id="footer">click here to display <em>Both Text and Background</em></div>
    </form>
</body>
</html>
Command to Check IP's connected in the LAN
Open command prompt or type in cmd in the run box and type in your desired command
netstat -n : Returns all the actively connected IP's, foreign address, local address and state
http://commandwindows.com/netstat.htm
ipconfig /all : Gives you a full detail about the connected IPs in your network
arp -a: another way to check active IP's
netstat -n : Returns all the actively connected IP's, foreign address, local address and state
http://commandwindows.com/netstat.htm
ipconfig /all : Gives you a full detail about the connected IPs in your network
arp -a: another way to check active IP's
Saturday, June 4, 2011
Acer Notebook (Boot from USB - Win XP)
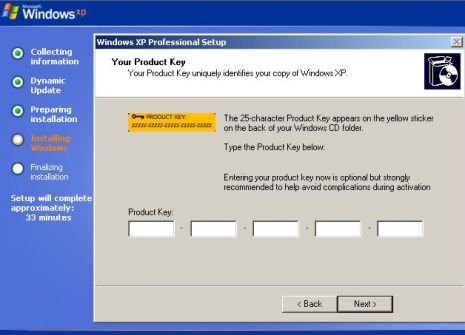
Hi there!, I thought it would be helpful for those people who wants to boot via a USB. These days its rare to see CD-ROMS in notebooks, and its not that worthy buying an external hard disk. The cheapest method would be a pen drive. Firstly I would like to say the purpose I had to use this method was that my notebook failed to boot-up, it gave a screen which said resuming windows and the screen stays idle. Therefore, I thought I should format the notebook, so I went through couple of articles in the web and learned how to boot up through the USB drive. The steps are outlined as follows:
Before we start make sure you have a (1GB or more) pen drive
Making the USB bootable
Lastly comes the drivers for your model..which you can Google and find out in their respective websites..
Before we start make sure you have a (1GB or more) pen drive
Making the USB bootable
- Download from the site [- Download Direct from CD Forum: USB_MultiBoot_10.zip- USB_MultiBoot_10.zip http://reboot.pro/4900/]
- Scan the file, and unzip it
- Click on the file [PeToUSB]
- Once the dialog box is opened [press a key to continue]
- Press [p] and it will open another software and then select the USB drive and press start
- Alert box appears press [Yes], then it will again ask "Are you sure you want to continue" press [Yes], then the formatting will start.
- Close the software once done
- Go back to the dos window, which will give you some options like "A..." "B..." and etc..
- Press [1] in which will open a selector box in which you will select your Pen/USB Drive
- Next press [2] to select the Windows XP folder, where you have you installation files. However, make sure you select the root folder eg. You might have sub folders like [DOCS][i386], so you have to select the root of these sub folders.
- Next you will get a dialog box stating a detailed summary of your installation like the Password, Serial and etc..Then press [Yes]to continue
- Next you will get random prompt boxes, then you have to fill in your data of your choice
- Press [2] again and select your USB/Pen drive and press [OK]
- Press [3] to copy files to the drive
- Press [Yes] to finish.
- Press [f2] to set up BIOS
- Go to boot options and set the booting order [Primary boot:Hard disk], SATA[IDE], f12 boot enabled [enabled], save changes and exit
- Next press [f12] to bring out a screen which will have three options, select [f12 boot from USB]
- Next select [1] from moving your arrow pointer and pressing enter in the screen where it states "Begin text mode setup windows xp..."
- Next you will be taken to windows setup wizard Now here is the trick!, Make sure you delete all partitions in the hard drive and then proceed to setup windows
- After installation the system will automatically reboot and next press [f12] to proceed to the small dialog box with the three options, proceed by selecting [f12 boot from USB]
- Next select the second option of the three options displayed, then you will be taken to the windows installation wizard
- Once you have installed everything, the computer will restart back again
- Again, press [f12] to get into the 3 options and select [f12 boot from USB] and select the second option which will take you to windows desktop
- Finally, remove the USB and restart the system, you will be prompted a screen stating "Microsoft windows XP professional" and one other option called "USB repair..", select "Microsoft windows XP professional" and here we go Windows XP...
Lastly comes the drivers for your model..which you can Google and find out in their respective websites..
Saturday, May 8, 2010
Actionscript Application
| ||||
| ||||


Wednesday, October 21, 2009
The Mirage of Wall Arts
 |  |  |
These were some of the artworks which I've thought would be very nice for wall hangers. These were done using Adobe Illustrator CS3. After doing the artwork I've thought these designs should bear a name, so I named them (beginning from top: 1. Centipede Stripes, 2. Beauty Hinders When Two Beauties Meet, 3. An Evening In the Golden paddy).
Tuesday, October 20, 2009
A Creative Eye On Matte Painting
This was one of my designs which i thought of sharing out to all those people who are really interested in matte painting. The painting was done in Photoshop CS3. The painting was done for a small video clip of 6 seconds "Raining in Camelot". The picture is a high definition image which was finally used for video production in After Effects CS3.

Subscribe to:
Comments (Atom)